This article is a migration of the same article previously hosted on Medium.
This article covers how to begin unit-testing your Android app using JUnit 5 and Mockito in Kotlin. It does not cover the fundamental concepts of unit testing, although these will be touched upon where relevant, and is not intended to be an exhaustive tutorial. Feedback is much appreciated!
Setting up your Gradle dependencies
You’ll first need to include the libraries in your project — we’ll do this by adding dependencies to our build.gradle file. Find the dependencies block:
dependencies {
    // there will be things in here
}
Find any references to JUnit and remove them — most default Android projects include JUnit 4 as standard, we want to remove this as it’ll conflict with the newer version of JUnit we’re going to add.
Next, add the following dependencies to your dependencies block:
testImplementation 'org.junit.jupiter:junit-jupiter-api:5.3.1'
testRuntimeOnly 'org.junit.jupiter:junit-jupiter-engine:5.3.1'
testImplementation "com.nhaarman.mockitokotlin2:mockito-kotlin:2.1.0"
testCompile "org.mockito:mockito-core:2.23.0"
(Note that these are the newest versions at the time of writing. You should ensure that you’re using the latest versions of all libraries where possible.)
This makes the following libraries available for use:
- JUnit 5 — our testing framework
- Mockito — allows us to create “fake”/mock objects to verify interactions
- MockitoKotlin — without this, using Mockito in Kotlin is a pain
Android Studio will prompt you to sync your dependencies, as the build.gradle file has changed — do so now.
Writing your first unit test
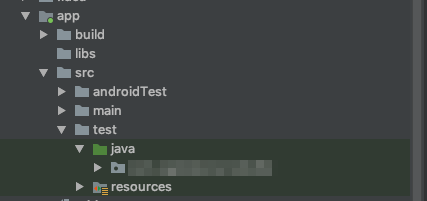
Let’s write a quick example unit test to make sure JUnit is working properly. In your Android project, locate the test folder and make sure it contains no class files. It should look something like this:
Inside your package, create a new Kotlin class file. For the sake of maintaining good naming conventions, it’s a wise idea to make it obvious which classes contain unit tests — I like to suffix my class names with “Test”, for example: SomeViewModelTest .
Inside your class, we can write a unit test:
@Test
fun `basic arithmetic test`() {
    val expectedValue = 4
    assertEquals(expectedValue, 2 + 2)
}
Let’s break this down a little bit.
- The
@Testannotation tells JUnit that this method contains a unit test. This is useful when you run entire suites of unit tests. - You can wrap your method name in backticks and use spaces in unit test classes — Kotlin allows this, and it enables you to write more expressive test names (e.g.
addingEmptyItemToRepositoryThrowsExceptionversusadding empty item to repository throws exception) assertEqualsis an assertion — this checks whether a certain condition is met, and if not, the test fails. There are other assertions for different conditions, for exampleassertTrue/assertFalsefor checking boolean values.
When using auto-import to fix your imports, make sure you import from JUnit and not kotlin.test as this will cause problems down the line.
If you right click on the test name, you are given the option to run your unit test. If everything is working properly, your test should pass! Now that we know JUnit is working, you should remove this test (there’s no point in testing Kotlin’s ability to do basic arithmetic).
Special methods in JUnit
JUnit gives us the ability to define a method that is called each time a test is run, when a test finishes, among other things. You can define a method that is called before each test is run by using the @BeforeEach annotation, which might look something like this:
@BeforeEach
fun setUp() {
    // Reset the view model between each test.
    viewModel = LoginViewModel(...)
}
You can also define a method that is called after each test is executed, to tear down any resources you might have created:
@AfterEach
fun tearDown() {
    ...
}
Mockito explained
Mockito is a framework that allows you to create “fake” versions of classes in your app — these are called mocks. Mocking is extremely useful as it allows you to test the interactions between your classes; for example, if you have a repository class and a controller to manage the contents of that repository, you can verify that your controller class is interacting with your repository in the way that you expect.
In your mock classes, there are stubs; these are fake versions of the methods in your class, for which you can pre-program return values. For example, if you want to test an error condition, you can set up your mock class methods to return values to simulate that condition, and verify the behaviour of the class you’re testing.
For the sake of demonstration, let’s assume that we have a view model, LoginViewModel, that talks to another class, LoginRepository , that holds our user data. If we’re going to check that LoginViewModel behaves as we expect, we should make sure that the interactions with our LoginRepository class are occurring as we expect them to. This is where mocking comes in handy.
Mocking object behaviours using Mockito
The example code here assumes that the LoginRepository is passed in as an argument to LoginViewModel ‘s constructor, as is the typical setup for an app that utilises dependency injection.
Start by creating a new class, LoginViewModelTest . In it, we can have a field, mockLoginRepository , which will hold our mocked-out login repository:
var mockLoginRepository: LoginRepository = mock()
The mock() method creates a mock based on the type it is being assigned to — in this case, we’ll get a mocked LoginRepository .
Next, we’ll create our setUp method, which lets us reset the mocks and view model (removing any stubs and leftover state) between tests:
@BeforeEach
fun setUp() {
    Mockito.reset(mockLoginRepository)
    viewModel = LoginViewModel(mockLoginRepository)
}
Now, assuming our view model has a method, getToken() , which returns the user’s login token from the repository, we can test the interaction between the view model and the repository like so:
@Test
fun `view model returns correct token from login repository`() {
    whenever(mockTokenRepository.getToken()).thenReturn("token")

    val expectedToken = "token"
    assertEquals(expectedToken, viewModel.getToken())
}
Now let’s run our unit test:
org.mockito.exceptions.base.MockitoException:
Cannot mock/spy class com.mypackage.LoginRepository
Mockito cannot mock/spy because :
- final class
Oops. This isn’t a bad thing — all classes in Kotlin are final by default, so we need to tell Mockito to enable the mock-maker-inline plugin to allow mocking of final classes:
- Under your
testfolder, create a new directory calledresources. - Inside your
resourcesfolder, create another new folder calledmockito-extensions. - Inside your newly-created
mockito-extensionsfolder, create a file calledorg.mockito.plugins.MockMaker. - Inside that file, paste
mock-maker-inlineand save it.
Now, when you re-run your unit test, it should pass! 🤞🏼
Let’s break down what went on in that unit test we just wrote.
- The
whenevermethod allows us to create stubs in our mock classes. In this case, we’re creating a stub for thegetToken()method in our repository class. - The
.thenReturn()method defines some behaviour for our stub; in other words, what happens when we call our stubbed method on the mock object. In this case, we return a value ("token"). - Because we passed our mock object to the constructor of the view model, it will call our mock object’s stub instead of the real method.
We can check this works because we can change the value in the thenReturn() method, and the test should fail because the expected and actual values no longer match up.
Testing interactions using Mockito
We can also verify interactions between our classes using the verify method in Mockito. verify allows us to see if a method is being called — if verify() is called and the stub method has not been called a specified number of times (once by default), the test will fail.
In this example, let’s assume our repository class also has some methods for handling cached data ( hasCachedData() , getCachedData() ), etc., and our getToken() method from before uses these to check for cached data before making a network request.
We can verify that the methods we should be calling are actually called like so:
@Test
fun `any cached data is returned when we get the token`() {
    whenever(mockRepository.hasCachedData()).thenReturn(true)
    whenever(mockRepository.getCachedData()).thenReturn("cached")

    val expectedToken = "cached"
    val actualToken = viewModel.getToken()

    verify(mockRepository).hasCachedData()
    verify(mockRepository).getCachedData()
    assertEquals(expectedToken, actualToken)
}
When we call the two verify methods, Mockito will check how many times that stub has been called, and if it has been called more than once, or it is never called, your test will fail.
You can also specify how many times your method should be called; if you expect a specific number of calls, you can pass times() as a secondary argument to your verify() method:
verify(mockRepository, times(2)).hasCachedData()
In this case, the test will fail if mockRepository.hasCachedData() is not called exactly twice. There are some similar methods for more fine-grained control:
- The
atLeastOnce()option is useful if you don’t care how many times your method is called, as long as it is called once. - The
never()option is useful if you want to check that a particular path is not followed in your code — in this example, you might want to check that the network request is not sent if there is cached data. - You can also use
atLeast(x: Int)andatMost(x: Int)to specify a range.
Conclusion
Mockito and JUnit 5 are powerful tools that, when used in combination, allow you to test the code you write more efficiently (as it can remove the need to provision resources to test your code, e.g. needing to create a sample API and database just to make sure your API controller works as you expect).
There is much more to cover on this topic — a future post from myself will cover topics such as spies, argument captors and further behaviours you can specify for your stubs. Do keep your eyes peeled if you enjoyed this post!